So, here are the cakes that I did. Hope you all like them.
Monday, 28 May 2012
Hello!!!!!
HI everyone, sorry I haven't been on here for a while. It has been a very busy last few weeks.
So, here are the cakes that I did. Hope you all like them.
Saturday, 10 March 2012
How to make a Number 1 Cake....
Hi everyone... I took photos while I did this cake. My mum taught me this method, so all the credit goes to her! Hope you all like it..
First I baked a 7" sqaure cake. Then I torte it twice. You can use any size square cake and follow the same method.

Then I cut two small pieces from each side. So now the width of the bottom piece should be as same as the middle piece.

Then I placed those two small pieces on to the top left hand side of the cake, to make the pointy part of the number 1. Then cut a triangle shape off it.

Here is a photo showing after cutting off the triangle piece.

Then I started filling it. I didn't bother putting the filling to the pointy part, as it was quite small. Once I filled everything, I attached those small pieces with buttercream.
I used a buttercream dam around the edge of the cake before filling the cake.

Then filled it with buttercream....
First I baked a 7" sqaure cake. Then I torte it twice. You can use any size square cake and follow the same method.
Then I cut a strip, around 3" wide.
I used that strip as the middle part of the number 1 and the bigger piece for the bottom part.

Then I cut two small pieces from each side. So now the width of the bottom piece should be as same as the middle piece.

Then I placed those two small pieces on to the top left hand side of the cake, to make the pointy part of the number 1. Then cut a triangle shape off it.

Here is a photo showing after cutting off the triangle piece.

Then I started filling it. I didn't bother putting the filling to the pointy part, as it was quite small. Once I filled everything, I attached those small pieces with buttercream.
I used a buttercream dam around the edge of the cake before filling the cake.

Then filled it with buttercream....
The second layer went on top of the buttercream filling. Again another buttercream dam around the edge of the cake. And then filled it with Jam..
Labels:
Balloons,
Banners,
Cricket bat tutorial,
How to....,
Number 1,
step by step,
sugarpaste
Friday, 9 March 2012
Thursday, 16 February 2012
Hello Kitty Cake.
Here is a cake that I really loved doing. It was for a little girl's 5th b'day and she loves Hello Kitty!
And here is how I made it!!!!!!!
First I covered a 5" square cake drum in yellow sugarpaste and used Earlene's mat with the dots to imprint it. Then I let it dry overnight. Then added three forget me not flowers towards bottom right hand corner. I also cutout a number 5 from some dark pink flowerpaste and let it dry too....
Then took a ball of white sugarpaste and make it to a cone shape and stood it upright to use it as the body.
Then took two more medium size balls and made two cones out of them and flatten a bit to get the shape of the paws and glued them to the body.
I used the lid of my pastry cutterset box to cutout a circle for the dress as I couldn't find a bigger circle cutter. All the cutters I have are small for the dress.
Then I glued the number 5 to the front of the body.
For the hands, again two balls of white sugarpaste, rolled into two sausages and roll a bit more from the middle of each suasage and then flat one end.
Placed the body on the sugarpasted drum and then glued them to the sides of the body, and place them to look like she is holding the number 5. I also inserted a toothpick from the top of the body to attach the head.
To make the head, I rolled out a oval shape white sugarpaste and pinched from top left and right to make the ears.
I used a small ball of yellow sugarpaste for the nose and two tiny black oval sugarpaste for the eyes. I painted the whiskers with black paste with vodka. I made a little bow to go on the right ear.
And attach the head to the body using some sugar glue. And here it is............

Labels:
Cricket bat tutorial,
Hello Kitty,
step by step,
sugarpaste
More sugar creations!!!!!!!!!
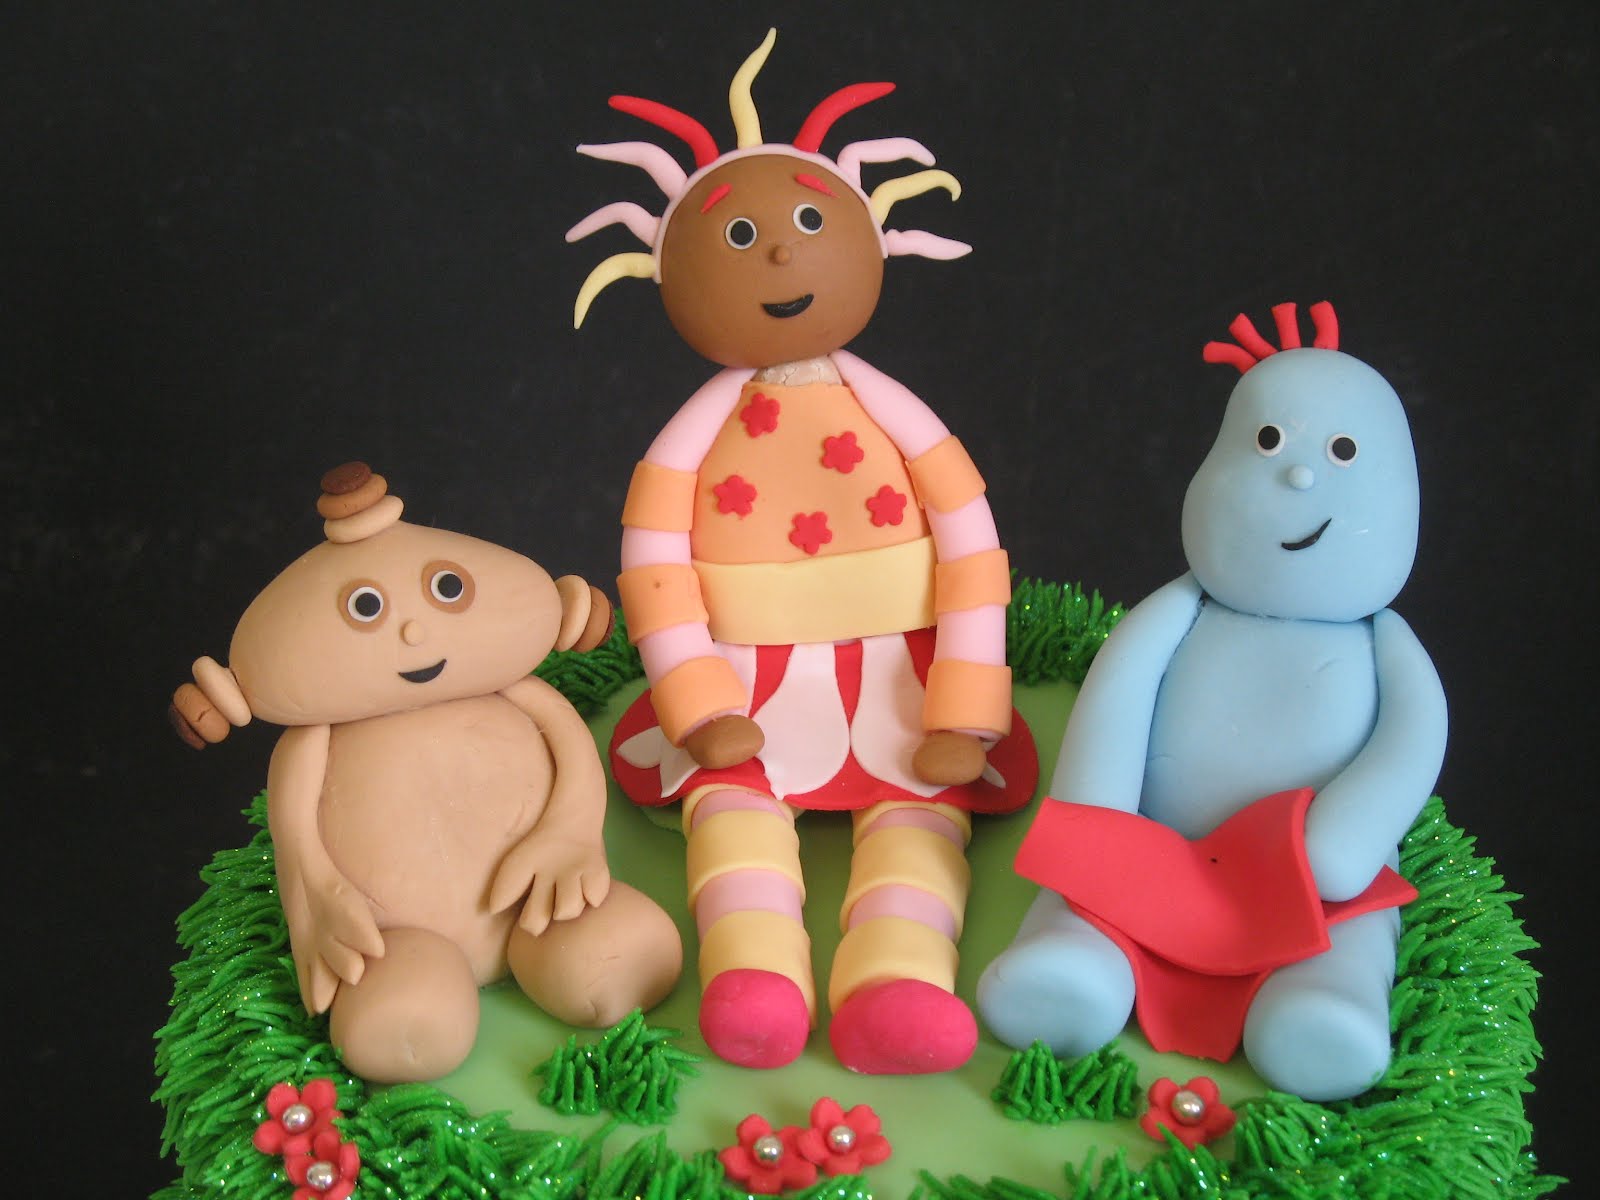
I made these characters from In The Night Garden children's programme.

I made them for a friend of mine who used these as a cake topper. I also made few heads of these characters to go on cupcakes. She kindly sent me a picture of it. Here is her lovely cupcake display....

And here is a closeup of the cupcakes...
I made them for a friend of mine who used these as a cake topper. I also made few heads of these characters to go on cupcakes. She kindly sent me a picture of it. Here is her lovely cupcake display....
And here is a closeup of the cupcakes...
Wednesday, 15 February 2012
Happy New everyone!!!!!
Hi my dear friends..... I know its a bit late to wish for the New Year but I still wanted to!!! So hope all of you had a great Christmas and New Holidays......
Ok, so here are some cakes which I have done last few weeks.........

And here is a cutting cake to go with it.

This was for a little girl's 1st b'day. The figure is actualy a fairy. There are wings at the back. I should have made them a bit bigger. Will keep that in mind for next time!!!!!!!!
Ok, so here are some cakes which I have done last few weeks.........
This was for my second son't b'day. Unfortunately we couldn't have the party due to snow. But he is having the party next month. So he is going to have another cake!!!!

The customer bought all the toys to go on the cake. I attached them to the cake with some royal icing.
This was for a little boy's christening. I use Earlin's mat to imprint the diamond shapes and then piped over it with white royal icing! I followed Elain Thomas's video to make the baby blocks. If you want to have a look, please click here...

And here is a cutting cake to go with it.

This was for a little girl's 1st b'day. The figure is actualy a fairy. There are wings at the back. I should have made them a bit bigger. Will keep that in mind for next time!!!!!!!!
Labels:
Edible image,
Fairy,
Fondant bow,
Minnie mouse
Tuesday, 8 November 2011
How to make a Cricket Bat Cake....
I started by baking a 7" square chocolate cake. Use what ever cake you fancy. Before I started cutting, I put the cake in the fridge for 30 minutes, so when I cut the cake, there's only little bit of cake crumbs.

Then I cut it in half, one half into half again and another piece from that into half. Have a look at the photo to see what I did...

Then I arranged the pieces to the shape of a bat. The biggest piece to the bottom and the medium piece above that and the thin pieces for the handle.
Then I shaped the square edges a bit to get the curved look. Then cut every piece in half and filled with Ganache buttercream and put the pieces back together and put a layer of ganache buttercream on the top. Then I put it in the fridge to firm up a bit. You don't have to put buttercream. You can straightaway use ganache.
Here is the ganache I made. If you want to have a go at making ganache have a look at this video by Inspired by Michelle.. She also got few more videos and they are amazing!!!
Here is the ganached cake.
Here is the smoothed cake..
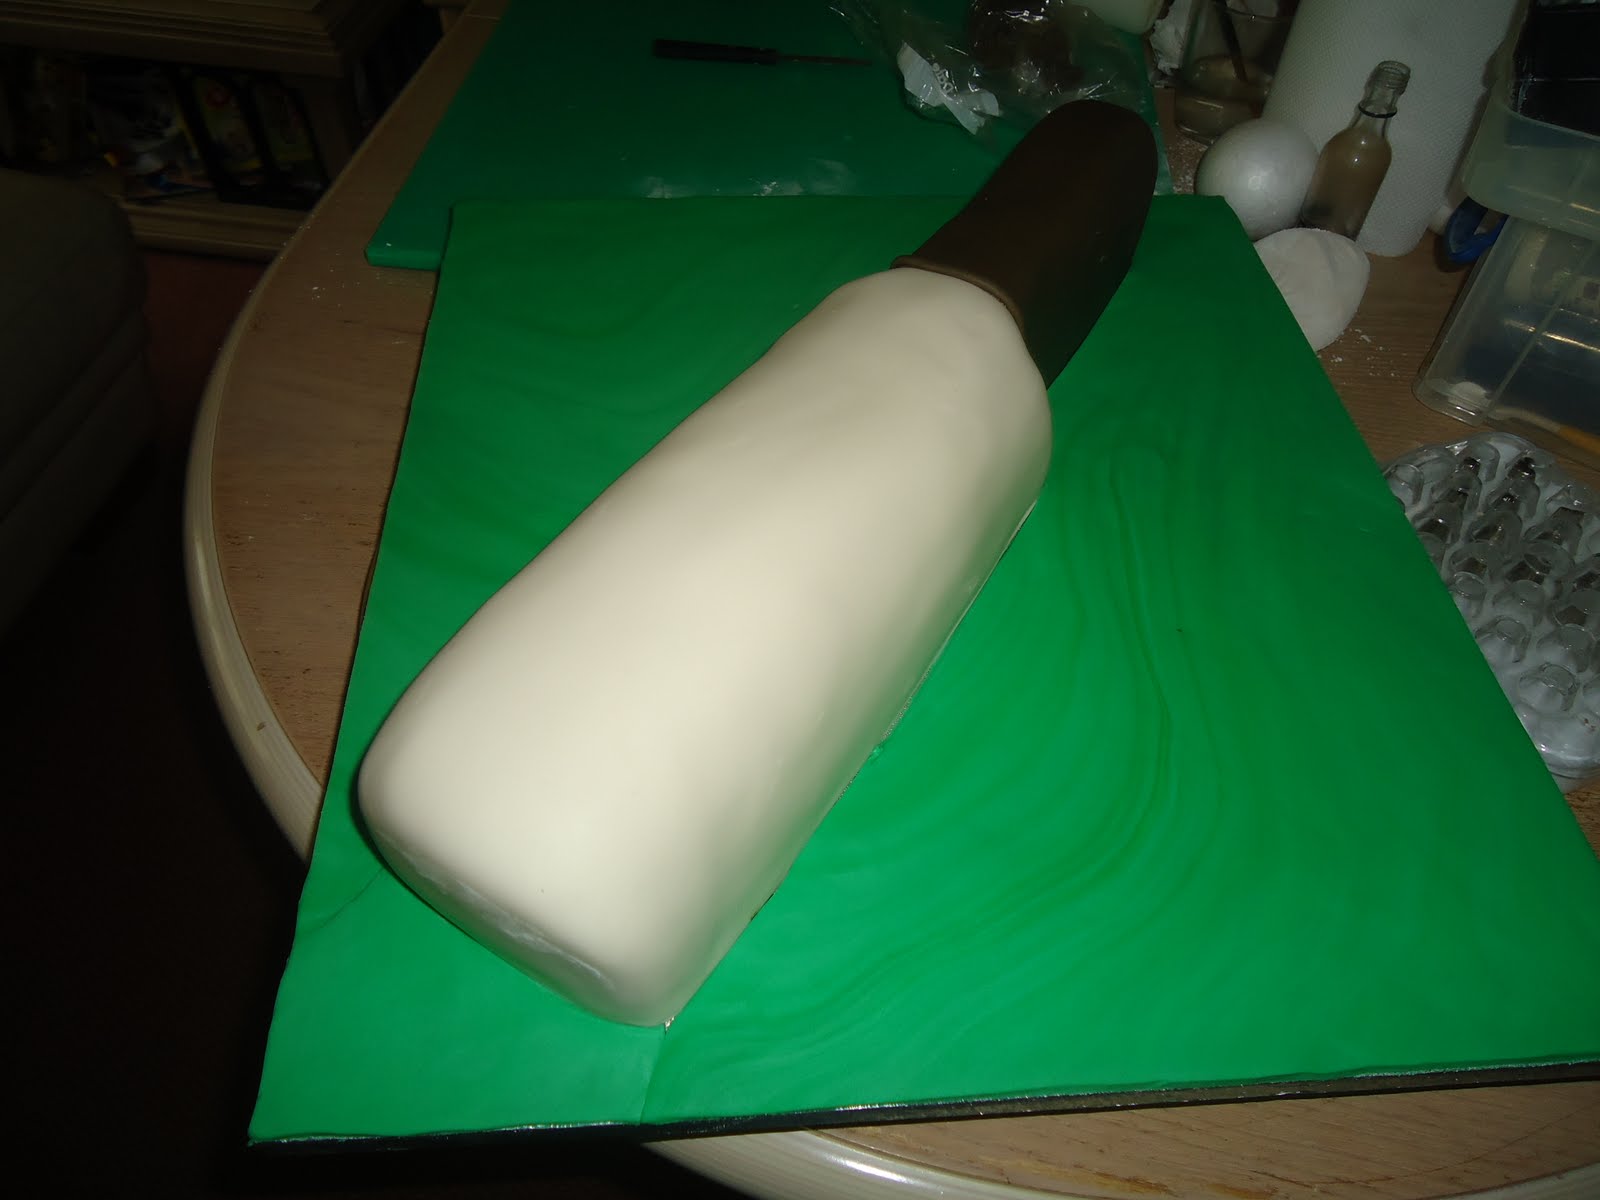
Then I covered the handle with brown sugarpaste and then covered the bat with ivory sugarpaste. Once that is done, I covered the board with green sugarpaste. Then added a thin sausage from sugarpaste around the edge of the bat.

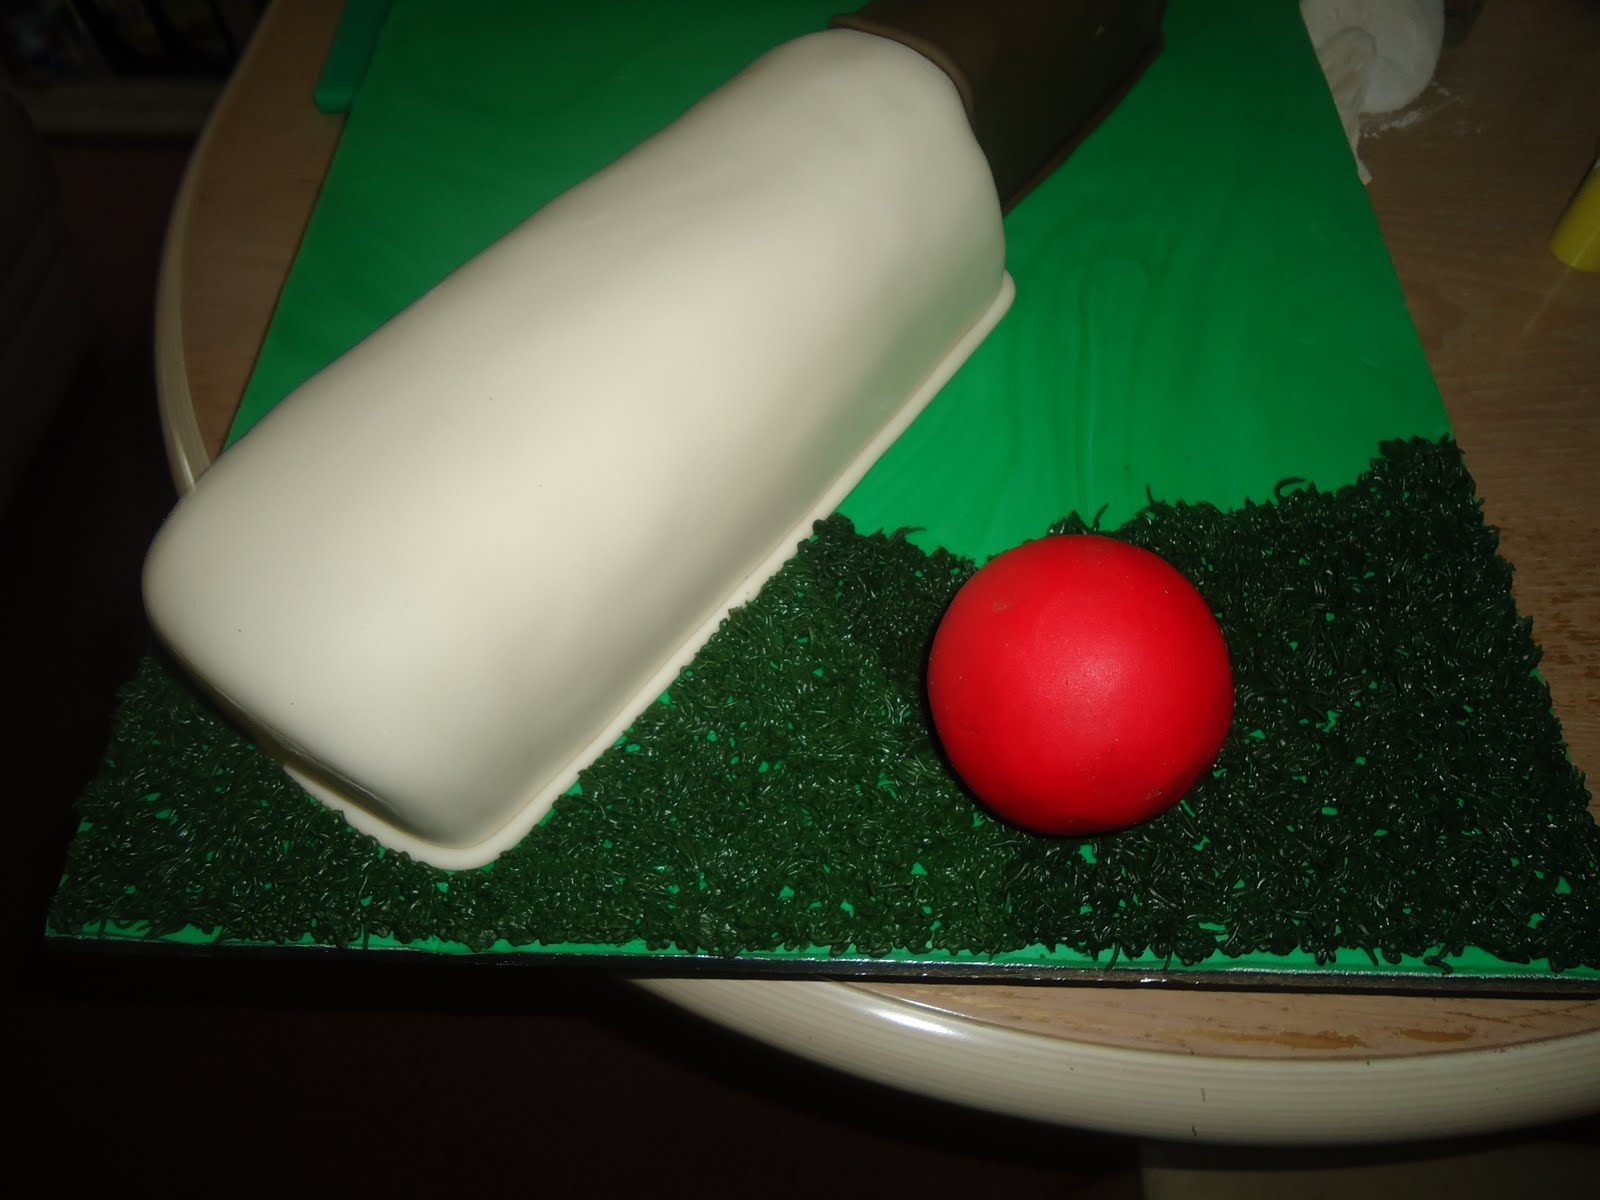
I had some styrofoam balls, so I used one of them to make the ball. I just covered it in red sugarpaste. I glued the ball beside the bat and it was a big mistake. Because I wanted to put the grass with green royal icing, and it was difficult to put the grass around the ball. So make sure you put the grass first and then keep the ball on that...
Here is one with the grass........

I finished it by adding the wordings, an edible image cutout of a Kookaburra logo and a ribbon around the board.
Subscribe to:
Posts (Atom)